Health & Fitness
How to Do the Half-Kneeling Pallof Press for Core Strength and Full-Body Stability
Some lifters will only consider training their abs with high-repetition bodyweight exercises. If they do add resistance, it’s often with exercises performed on highly stabilized machines, excessively heavy movements with compromised technique, or basic cable crunch variations that don’t allow the abs to perform as efficiently as possible. That’s when it’s time to head into the cable station and hit your core with something new.
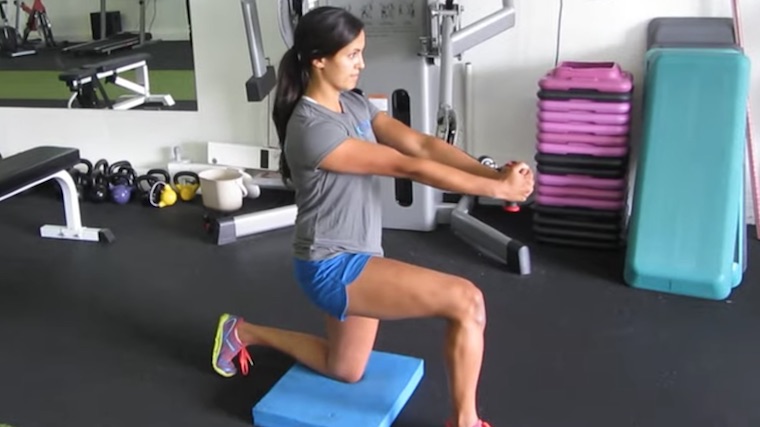
The half-kneeling Pallof press is a challenging, progressive core exercise derived from the basic standing Pallof press. The unique ground-based position challenges different musculature on both sides of your body while coordinating your torso, core, and legs with different tasks.
Here’s a review of all the elements you need to know about building total-body stability and core strength with the half-kneeling Pallof press.
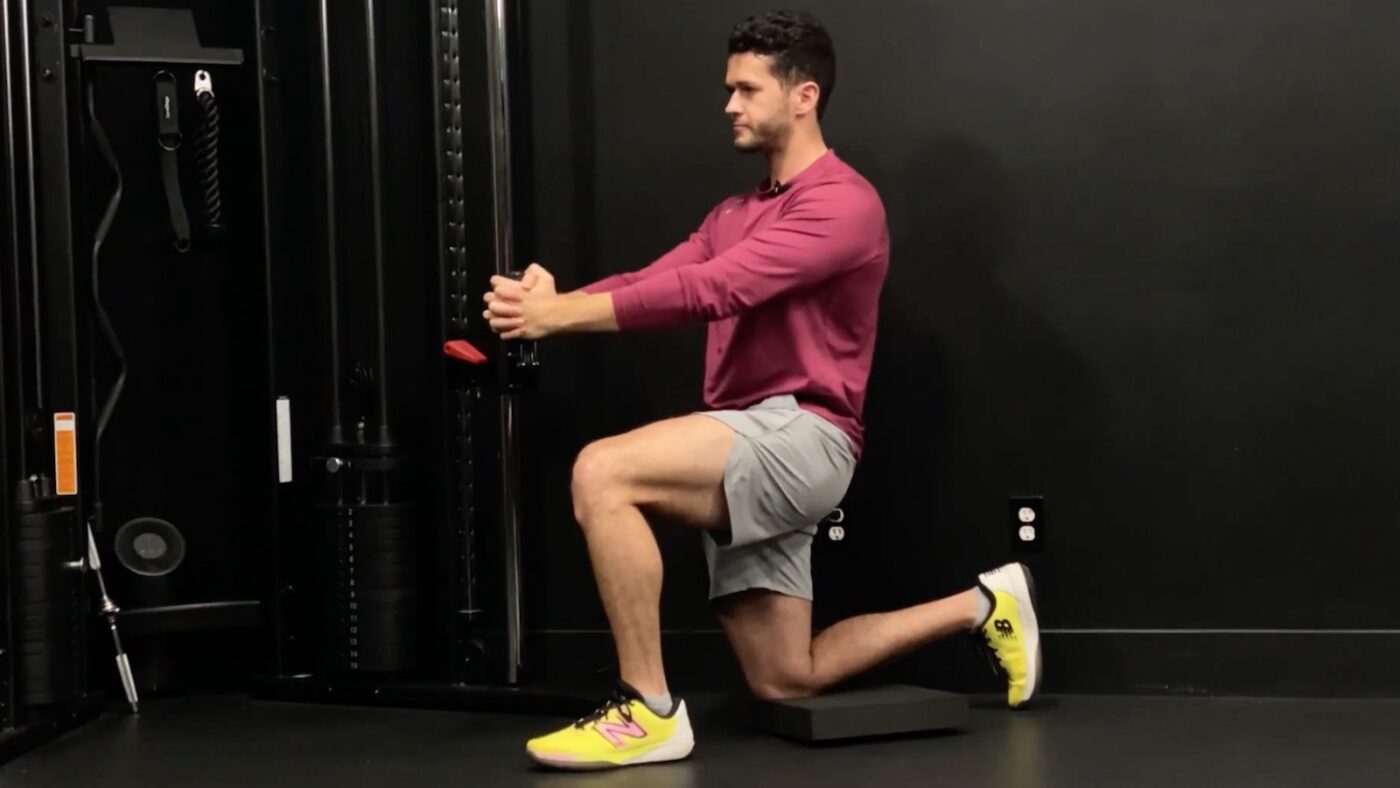
Half-Kneeling Pallof Press
Half-Kneeling Pallof Press Video Demonstration
Author James Shapiro explains the half-kneeling Pallof press and offers in-depth guidance for exercise technique, common mistakes, as well as several simple and effective ways to adjust the exercise.
How to Do the Half-Kneeling Pallof Press Step By Step
Following these detailed instructions to position yourself up for the half-kneeling Pallof Press will optimize your results. You will need a cable pulley system or a long resistance band with an anchor point that will not move, such as a squat rack.
Step 1 — Set Up Your Equipment and Position
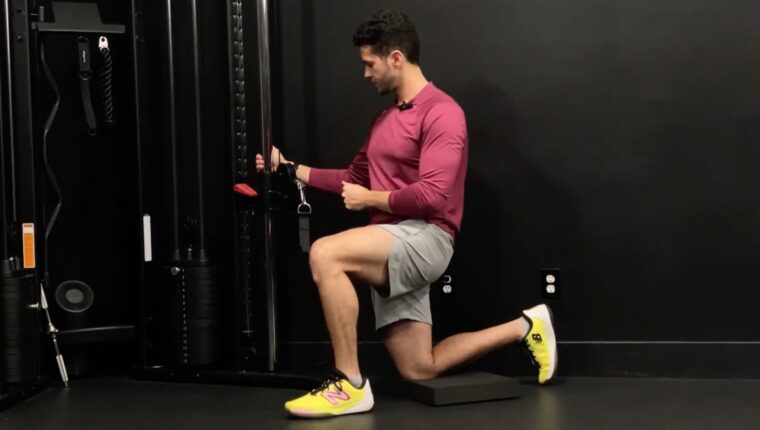
Being relatively comfortable is a priority since you’re in a half-kneeling (one-knee down) position Use a pad to cushion your knee if you don’t like the surface you are kneeling on. Set the pulley or band height so that the resistance runs in-line with your sternum — above your hips and under your chest — when you’re in the kneeling position.
Stand sideways to the cable and assume a half-kneeling position with the foot of your outside leg flat on the ground and the knee, shin, and toes of your inside leg on the ground. Your outside leg should have a roughly 90-degree angle relative to your hip and knee. Set the heel of your outside leg directly underneath the same side knee and set the knee of your inside leg underneath your hip.
Form Tip: Tucking the toes of your inside leg down (aiming your shoelaces to the ground) will add an extra level of lower-body bracing and activation. If you keep that foot pointed up on its toes, you might experience less hip stabilization and glute activation.
Step 2 — Brace with the Weight
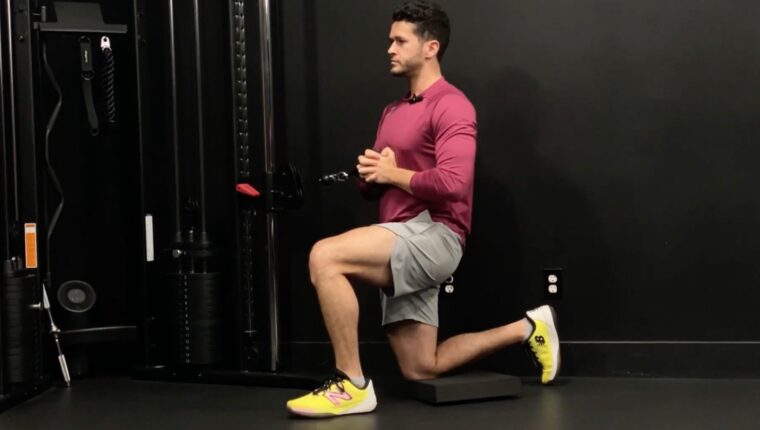
Grab the cable or band with both hands and interlock your fingers. Slowly pull the handle to the center of your sternum. With your lower body in position, drive your shoulders down pull your elbows to your sides to brace your total-body position before initiating the movement.
Keep your outside leg strong by engaging your glutes and activating your shoulders prior to the press. You should be able to maintain these key positions throughout the entire exercise.
Form Tip: The half-kneeling Pallof press is not an evenly distributed movement toward the body. The rotational forces being applied by the resistance are biased more toward the side closest to the band’s anchor point. This means you need to work even harder with the side farthest from the anchor point (the outside half of your body) to stay in line and balanced. This is also why it’s essential to perform reps equally on both the left and right sides.
Step 3 — Press and Pause
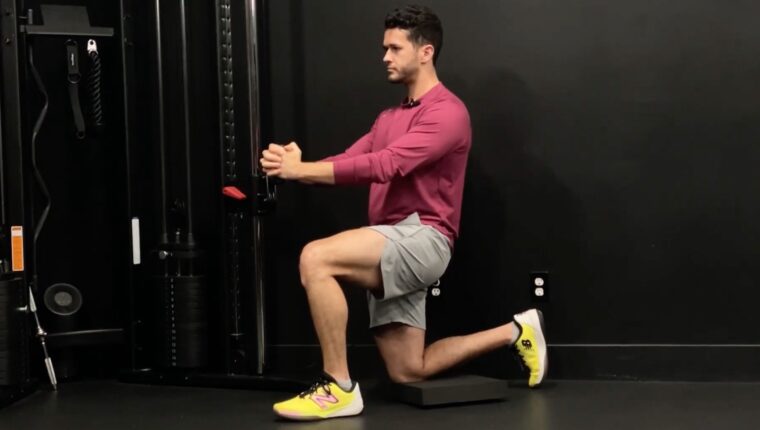
Keep your lower body stable as you press your hands in a straight line, from the center of your sternum, away from your body until your arms are locked out. Pause briefly in the locked out position.
This is the hardest point of the movement — when your arms are farthest away from your body. The greatest amount of anti-rotation occurs when the arms are extended and the hands are the furthest point away from the sternum. Pausing in the arms-locked position will maximize tension through your core.
Form Tip: Do not try to exceed the muscular stress your body can maintain. If you start to feel that you’re shifting away from pressing in a straight line as your arms extend, do not go further just to get “more” out of the exercise. At that point, it’s likely you’ve lost some of your initial brace and need to return to the starting position. If necessary, stop before lockout to maintain position.
Step 4 — Return to the Starting Position
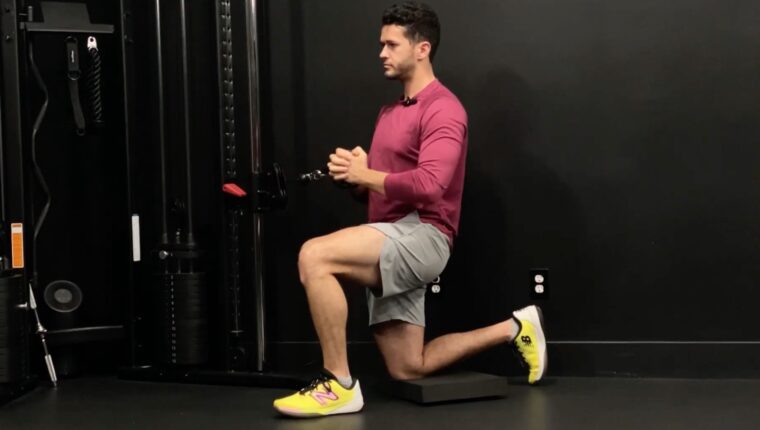
Bring your hands back to your sternum in a controlled manner. Repeat steps two through four — brace, press and pause, return — for your intended repetition scheme before carefully returning the weight back to the anchor point.
Form Tip: There is no need to speed through the half-kneeling Pallof press. With a reduced and lowered base of support, plus a greater emphasis on core control, you need to be careful and deliberate with each individual repetition. Focus on quality movements instead of piling up a quantity of repetitions.
Half-Kneeling Pallof Press Mistakes to Avoid
A successful half-kneeling Pallof press requires a lot of moving parts and internal communication. Steer clear of these common mistakes to maximize your performance and results.
Leaning Too Far Forward or Backward
One common issue with half-kneeling positions is that people sometimes have a hard time understanding what a “neutral hip position” actually is. Either their torso leans too far forward because their lower body is positioned wrong or they lean back too much “for balance” and create too much extension through their low back.
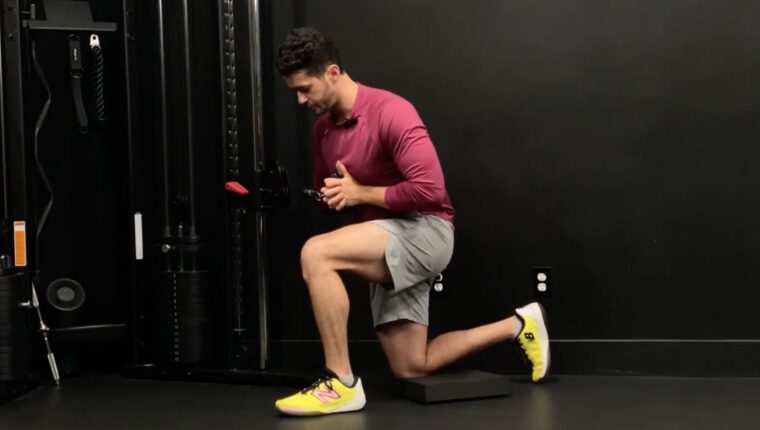
Avoid it: Think about keeping your upper body as tall as possible when entering the half-kneeling Pallof press. When you look down, you should see your hips are under your shoulders and above the knee of your lower leg. If you start to see an angle form between your torso and front thigh, you’re likely pushing your hips back.
Allowing Your Outside Knee To Collapse
Your outside knee might experience some movement during the pressing motion as your core is activated and your body fights against the resistance, however your knee can actually be the last place a lot of people focus on.
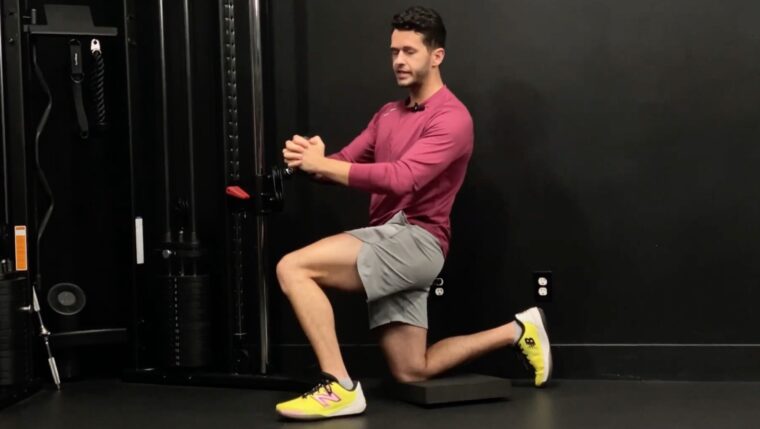
If your outside knee collapses inward toward the weight, it is demonstrating a lack of coordination from your glutes and obliques. Loss of coordination and strength from the internal obliques on the outside portion of your body can lead to more torso rotation toward the inside leg.
Avoid it: Be attentive to not push your knee out excessively. Having your inside-leg toes tucked under and engaging your glutes will help your outside leg maintain stability. An additional cue is to focus on how much ground pressure you are developing — feel power coming up from your outside foot. Pushing through the big toe of your outside leg can keep your hips and ankle in more efficient alignment.
Having Your Arms Fall “Off-Center”
Finding an imaginary line on the floor or focusing on a spot on the wall may initially be hard, but it’s possible when you don’t have any tangible landmarks to aim for while pressing away from your chest.
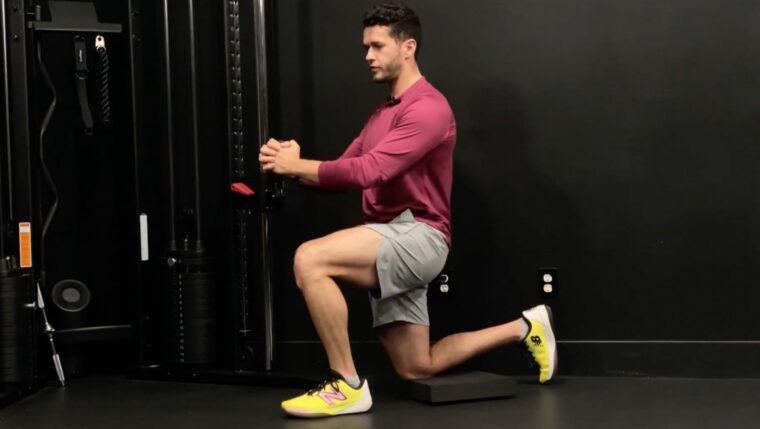
Once you’ve picked a target, your arms should not be moving excessively “off-center”. If they do, it indicates you have either lost the brace position or you’re using too much resistance. Being in a half-kneeling position only amplifies either of these two common faults because your stability is challenged that much more.
Avoid it: You can either reduce the resistance, which should allow you more overall control, or you can slightly reduce the range of motion to a stay in a more easily controlled position. The half-kneeling position is a very demanding variation for any movement let alone an anti-rotation core movement.
Hips Falling To The Side
Poor oblique control paired with a lack of adductor (inner thigh) activation from your outside leg will lead you to have your hips falling to the side. Some of the functions of your obliques (side abs) include rotation, flexion, and lateral flexion — performing those movements as well as resisting them.
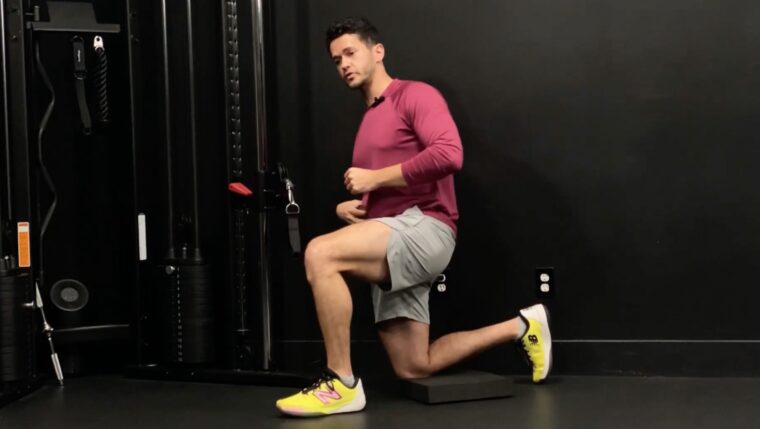
As you press forward, you may notice your hips potentially falling to the inside if you’re not strongly stabilizing the adductors of your outside leg.
Avoid it: Imagine you’re slightly crunching your obliques prior to your brace and press — just imagine, don’t actively crunch sideways. With your obliques and core fully engaged prior to pressing, you can expect little-to-no movement at your hips.
How to Progress the Half-Kneeling Pallof Press
Progressing through the half-kneeling Pallof press comes in a variety of ways. Using a band or cable pulley system can be a preference or a factor of accessibility depending on your available equipment. When the basic half-kneeling Pallof press becomes mundane or “easy,” challenge yourself with these small adjustments.
Pause Repetitions
Changing your tempo (speed of movement) is one of the best initial ways to progress a standard half-kneeling Pallof press, outside of changing your sets and reps. You can challenge your core with a longer pause in the lockout position before returning your hands to your sternum. You can also add multiple pauses for a second or less at specific points throughout the range of motion to make each repetition longer, creating more time under tension.
Increasing Repetitions Performed
Performing any anti-rotation exercise depends on the strength and endurance of your entire core musculature working together. Increasing the number of repetitions performed puts a strain on your core and challenges your local and overall muscular endurance. Making small incremental jumps in repetitions will also increase the amount of time worked and is a form of linear progression.
Benefits of the Half-Kneeling Pallof Press
The list of benefits the half-kneeling Pallof press holds may persuade you to add it into your workouts even if it may not look like the most interesting exercise. The research and evidence demonstrate the effectiveness of this exercise for relieving pain, supporting strength development, and improving sport performance. (8)
Reducing Lower Back Pain
One of the primary sources of work absence and disability is lower back pain (LBP). (1) With sedentary lifestyles, bad ergonomics, and poor posture, it shocking to see that more than 50% of people in the United States are affected by lower back pain that can lead to physical therapy or disability. (12)
By using the half-kneeling Pallof press to train the muscles responsible for improving the stability and endurance of your lumbar spine and hips, you can either reduce, eliminate, or prevent pain and discomfort in your lower back.
Increasing Your Strength
Performing compound (multi-joint) exercises like squats, lunges, deadlifts, overhead pressing, and bench press requires minimal movement where there should be stiffness. Many hear the word “stiffness” in a gym setting and attach a negative connotation. However, in places where there should be stiffness — such as your low back and spine — stiffness can simply mean wanting to be as stable as possible.
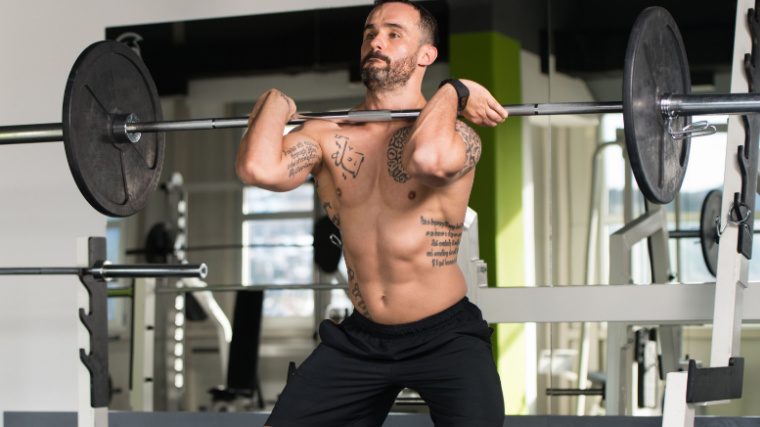
The effects of abdominal bracing have been shown to increase the strength and power of trunk and hip extension. (10) A core program that includes the half-kneeling Pallof press can stimulate intra-abdominal pressure, which helps to create that much-needed stability, and results in improved force output.
Sport Performance Improvements
Athletes who play sports are going to be rotating through their spine to generate force when they change direction, move sideways, jump, throw, or swing. Having the ability to generate core stiffness in certain athletic positions can also lead to great force application and prevent “energy leaks” (losses of strength and power) from occurring when attempting athletic movements. (5)(9)
Athletes who engage in core training with exercises like the half-kneeling Pallof press may see improvements in their athletic skill, agility, and power while maintaining a healthy spine. (2)(4)
Muscles Worked by the Half-Kneeling Pallof Press
Even though it has the word “press” in the exercise name, the half-kneeling Pallof press does not fall under traditional pressing exercises which would train your chest or shoulders. The press portion of the exercise is used to increase the lever arm and more strongly challenge your core stabilizers. You’re not actively lifting the weight during the pressing movement, so your chest and shoulders are not significantly recruited.
This means the muscles in your hips, core, and a few intrinsic muscles of your back get utilized a lot more than muscles of the shoulders, pecs, and triceps.
Obliques and Transverse Abdominis
Your internal and external obliques — found on each side of your abdominal wall — maintain abdominal tension, increase intra-abdominal pressure, and coordinate to rotate your trunk.
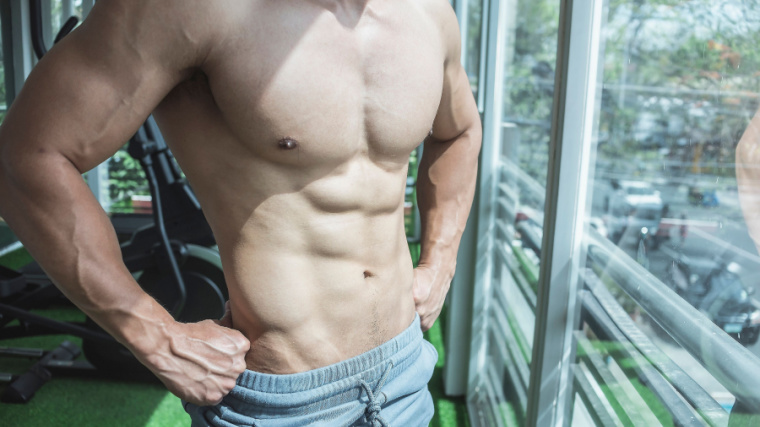
This buildup of intra-abdominal pressure reinforces the transverse abdominis (your “primary” abdominal muscle) to stabilize your spine and pelvis. (6) Coordination between all of these muscles help to keep your spine and trunk stable and relatively stationary during he half-kneeling Pallof press as you press with your hands away from your body. (11)
Hip Musculature
In the half-kneeling position, your hips work isometrically to activate and integrate your core muscles. Your hamstrings and glutes are firing to maintain hip extension on your inside leg while holding a neutral hip position. Your outside leg has the TFL (tensor fasciae latae, a hip muscle) to assist the leg in hip flexion. Your inside leg is relying on a neutral position that counteracts the hip flexion of the outside leg. These muscles work in concert to prevent your hips from tilting sideways, forward, or backward during the exercise.
Intrinsic Back Muscles
People often misinterpret “core muscles” to mean only those located where we can see them — on the front of our body. However there are smaller intrinsic muscles located on our back, near our spine, or with attachment to our ribs.
The erector spinae, semispinalis, quadratus lumborum, and multifidi are a few that play a part during the half-kneeling Pallof press. These muscles are designed to extend the spine, laterally flex the spine when contracted unilaterally, maintain posture, and stabilize the low back. (7)
How to Program the Half-Kneeling Pallof Press
The half-kneeling Pallof press is considered a “supplemental” or accessory exercise and doesn’t necessarily need to be the primary movement for your workout. Understanding where the half-kneeling Pallof press can be programmed will determine its effectiveness in your program. Also note, if you’re familiar with performing the standing Pallof press, use less resistance with the half-kneeling exercise due to the change of position.
Supplementing Your Main Compound Lift
Performing the half-kneeling Pallof press at relatively lower intensities can be beneficial to those who lack proper core bracing during heavier sets of their squats, deadlifts, bench pressing, or overhead pressing. (3)
Fatiguing your core is not a smart or effective approach before performing compound movements. However, performing the half-kneeling Pallof press with lower intensities (staying away from muscular failure) and lower volume (such as two sets of 10 to 12 reps) can reinforce and maintain core tension for your primary training movements.
Low Intensity Recovery Days
Adding the half-kneeling Pallof press to recovery workouts or low intensity days can be an effective way to prepare your body, and your central nervous system, for the more intense workouts during your training week. Performed at low to moderate volume — such as two to four sets of eight to 12 reps — can help prime your body for the next day. It can also help with small “power leaks” with your strength-based movements.
Positioned in a Core Circuit
Many experienced lifters have found that training multiple core movements together as a form of circuit training amplifies the intensity of each exercise, compared to performing separate exercises by themselves. Pairing up other core exercises such as suitcase carries, hollow body holds, or deadbugs can amplify the intensity of the half-kneeling Pallof press.
Half-Kneeling Pallof Press Variations
Challenging yourself with the half-kneeling position can be difficult, but definiely not impossible. Below are a few variations of the half-kneeling Pallof press that increase with difficulty and should be progressed slowly. Demonstrations can be reviewed in the technique video at the beginning of the article.
Pallof Press and Lift
Moving your arms away from your center-mass is the driving force behind the anti-rotational benefits of the Pallof press. The farther the leverage moves from your center, the more difficult it will be.
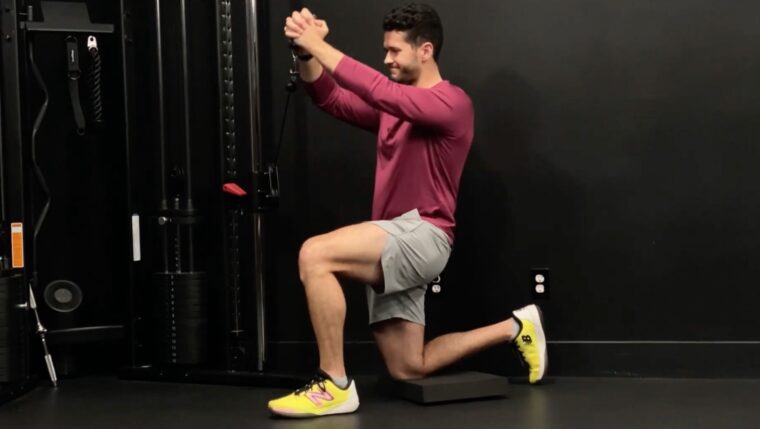
Adding a lift above your sternum, to eye-level or higher, further challenges your whole body to remain stable while engaging your serratus and shoulder stabilizers even more. Start small, as even a little movement will yield exponential difficulty to the exercise.
Pallof Perturbation Press and Hold
When your goal is to brace and maintain position, your body will work even harder when forces are trying to move you, rather than forces being manipulated more passively. This advanced exercise variation is performed with a small weight plate and a resistance band attached to an anchor point, rather than with a cable pulley.
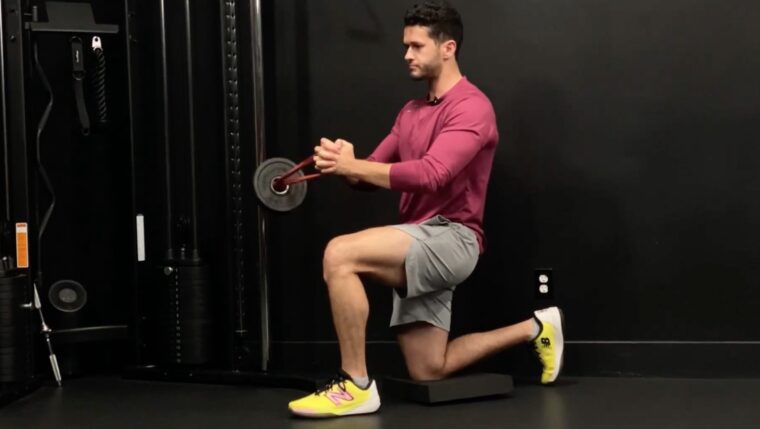
Attach a relatively light resistance band to the anchor point and slide a five-pound weight plate halfway down the band. Step out farther from the anchor position than normal and assume a half-kneeling position.
Focus on a rapid, almost explosive, press and hold the locked out position. The momentum of the movement should sling the plate forward and back. This forward and backward disturbance will try to push your body out of position. Work hard to maintain full-body tension, with core stiffness and a strong position, as the weight plate slowly comes to rest.
Isometric Split Squat Pallof Press
This variation increases lower body involvement while decreasing your base of support, which further increases the stability requirement. Start off in the half-kneeling position, brace, and press your arms in front of your chest. Then the hard part begins.
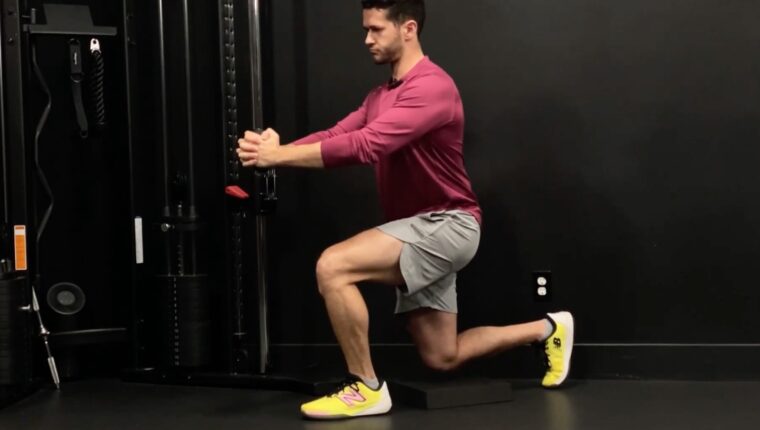
Hold the locked out position, and push from the ground with both legs until your back knee is slightly off the ground. Briefly hold this isometric split squat position before gently returning the knee back to ground. Keep your arms locked and repeat the split squat position for repetitions.
FAQs
By taking the half-kneeling position, you create an uneven environment when your outside leg enters hip flexion and your inside hip remains neutral. This position affects the oblique core musculature demands when comparing the half-kneeling position and the more evenly stabilized standing position.
It takes a lot of experience to build full-body tension and equally express force through both sides of your body. Naturally, people will have a bias from one side of their body, either due to overall posture or from favoring the dominant side of the body.
If you’ve ever felt a small turn or tilt to one side of your body when performing a lift, it’s a sign that you are losing tension during the movement. The half-kneeling variation can help address the oblique muscles on your relatively weaker side, so that your body can express force more efficiently.
Begin with relatively light weight or low resistance. If you’re using a looped resistance band, use a thinner band, as band tension exponentially increases as you stretch it farther from the anchor point.
If you have access to a cable pulley station, I would initially use 50% of the resistance you use if you’re familiar with performing the standing Pallof presses. If it’s your first time performing any Pallof press, use less than 10 pounds and master the technique before progressing gradually in weight.
References
- Chang, Wen-Dien et al. “Core strength training for patients with chronic low back pain.” Journal of physical therapy science vol. 27,3 (2015): 619-22. doi:10.1589/jpts.27.619
- Hibbs, Angela E et al. “Optimizing performance by improving core stability and core strength.” Sports medicine (Auckland, N.Z.) vol. 38,12 (2008): 995-1008. doi:10.2165/00007256-200838120-00004
- Huxel Bliven, Kellie C, and Barton E Anderson. “Core stability training for injury prevention.” Sports health vol. 5,6 (2013): 514-22. doi:10.1177/1941738113481200
- Kibler, W Ben et al. “The role of core stability in athletic function.” Sports medicine (Auckland, N.Z.) vol. 36,3 (2006): 189-98. doi:10.2165/00007256-200636030-00001
- Luo, Shengyao et al. “Effect of Core Training on Skill Performance Among Athletes: A Systematic Review.” Frontiers in physiology vol. 13 915259. 6 Jun. 2022, doi:10.3389/fphys.2022.915259
- Lynders, Christine. “The Critical Role of Development of the Transversus Abdominis in the Prevention and Treatment of Low Back Pain.” HSS journal : the musculoskeletal journal of Hospital for Special Surgery vol. 15,3 (2019): 214-220. doi:10.1007/s11420-019-09717-8
- Malátová, Renata, Jitka Rokytová, and Jan Stumbauer. “The use of muscle dynamometer for correction of muscle imbalances in the area of deep stabilising spine system.” Proceedings of the Institution of Mechanical Engineers, Part H: Journal of Engineering in Medicine 227.8 (2013): 896-903.
- McGill, Stuart M.. “Core Training: Evidence Translating to Better Performance and Injury Prevention.” Strength and Conditioning Journal 32 (2010): 33-46.
- Samson, Kim M. et al. “A Core Stabilization Training Program for Tennis Athletes.” Athletic Therapy Today 12 (2007): 41-46.
- Tayashiki, Kota et al. “Effect of abdominal bracing training on strength and power of trunk and lower limb muscles.” European journal of applied physiology vol. 116,9 (2016): 1703-13. doi:10.1007/s00421-016-3424-9
- Willson, John D., et al. “Core stability and its relationship to lower extremity function and injury.” JAAOS-Journal of the American Academy of Orthopaedic Surgeons 13.5 (2005): 316-325.
- Wu, Aimin et al. “Global low back pain prevalence and years lived with disability from 1990 to 2017: estimates from the Global Burden of Disease Study 2017.” Annals of translational medicine vol. 8,6 (2020): 299. doi:10.21037/atm.2020.02.175
Featured Image: James Shapiro Performance / YouTube
Source link

